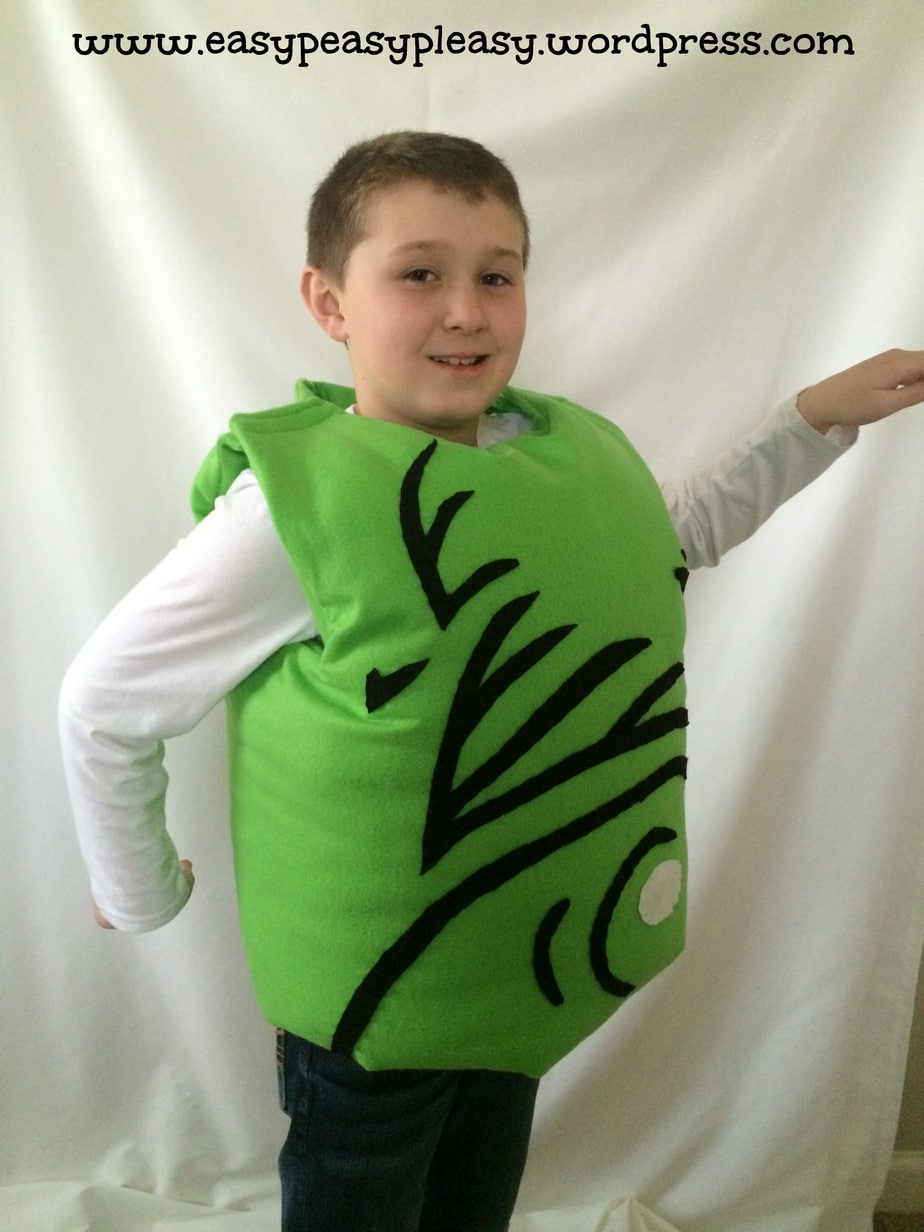
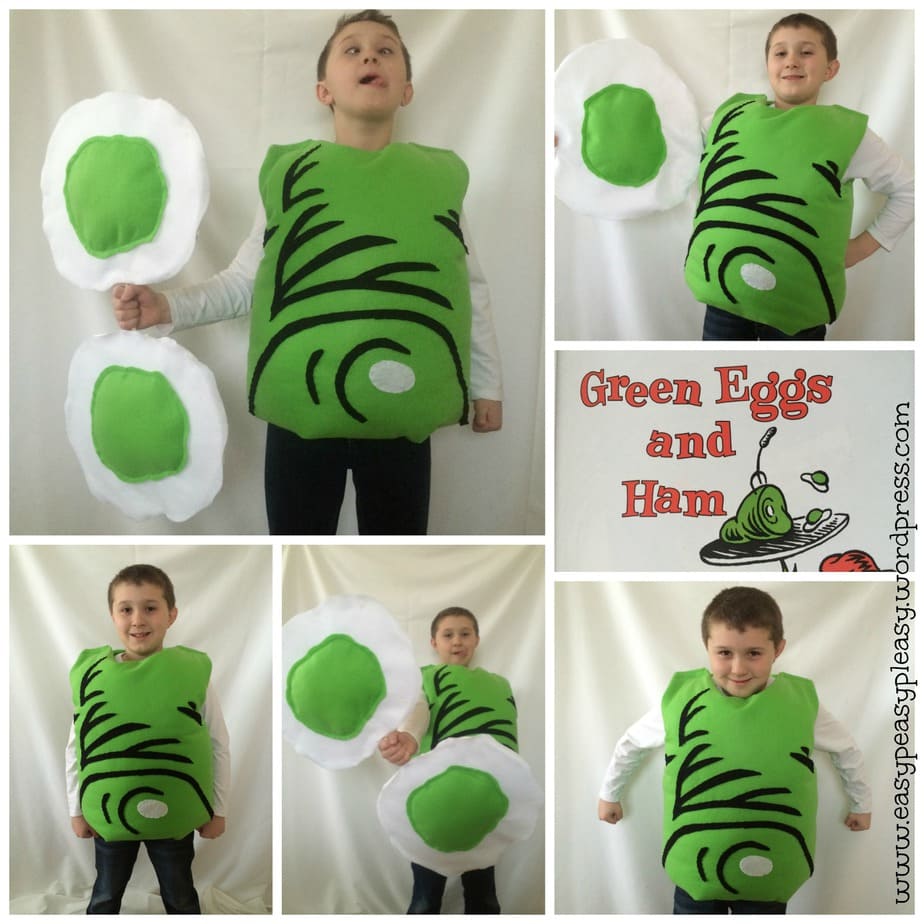
Dr. Seuss’s Birthday was Monday and our school throws down big time for that man! The whole week is a huge event! The PTO holds a costume contest, decks the school out from top to bottom, and gives out Seuss style snacks. The Second Grade puts on a special Seussical Musical and the school staff put on an amazing spirit day in honor of Dr. Seuss! It’s a huge event and I love it! This is one of my most favorite activities for the whole school year! I got to thinking what should Garrett be this year??? 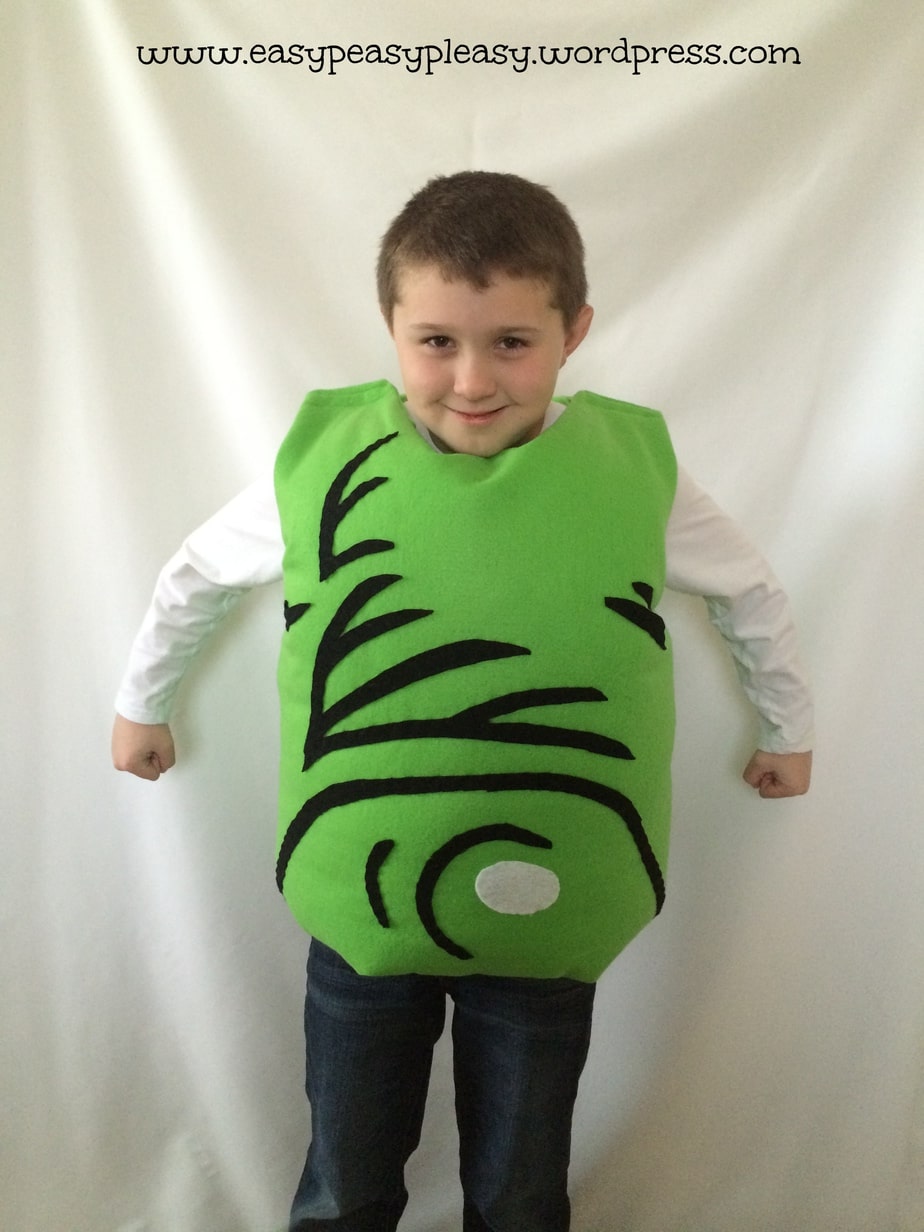
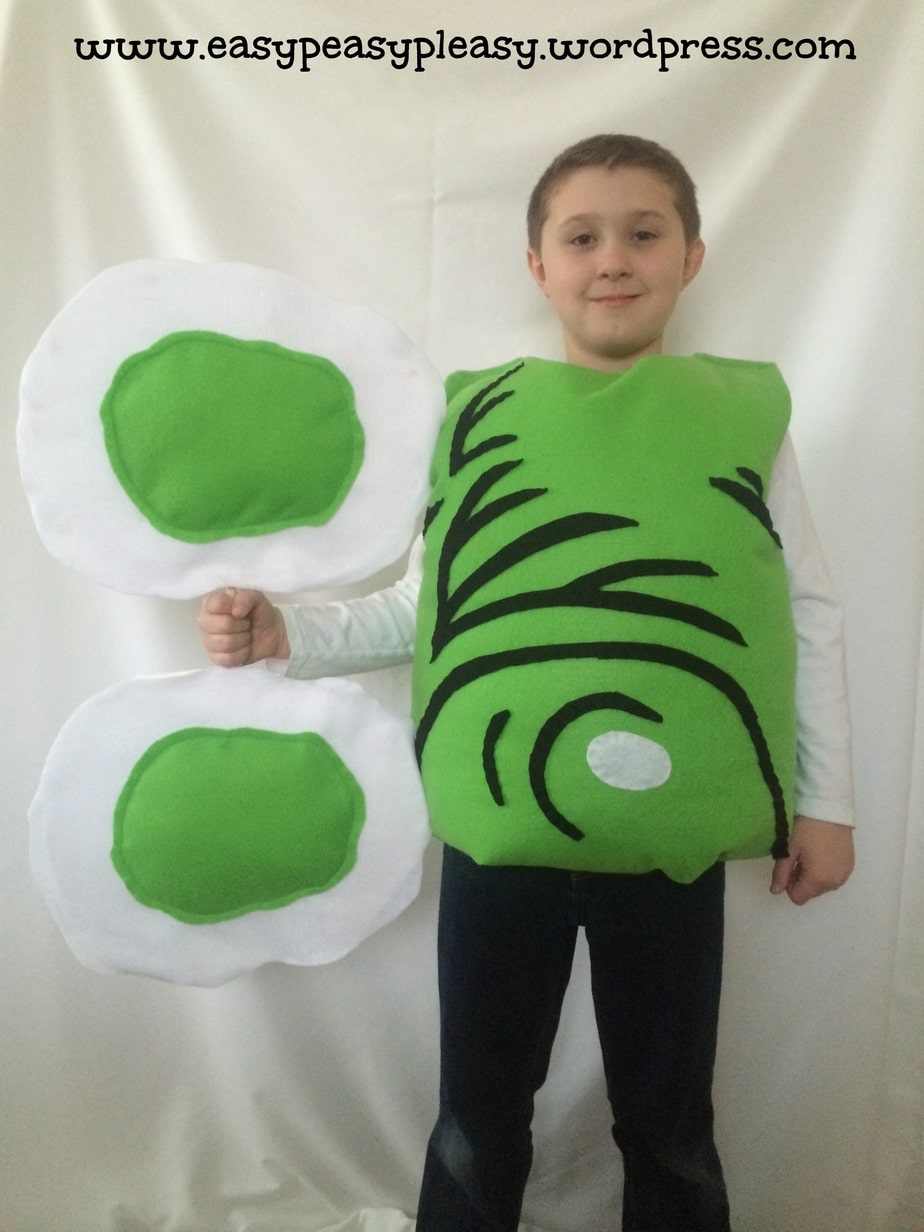
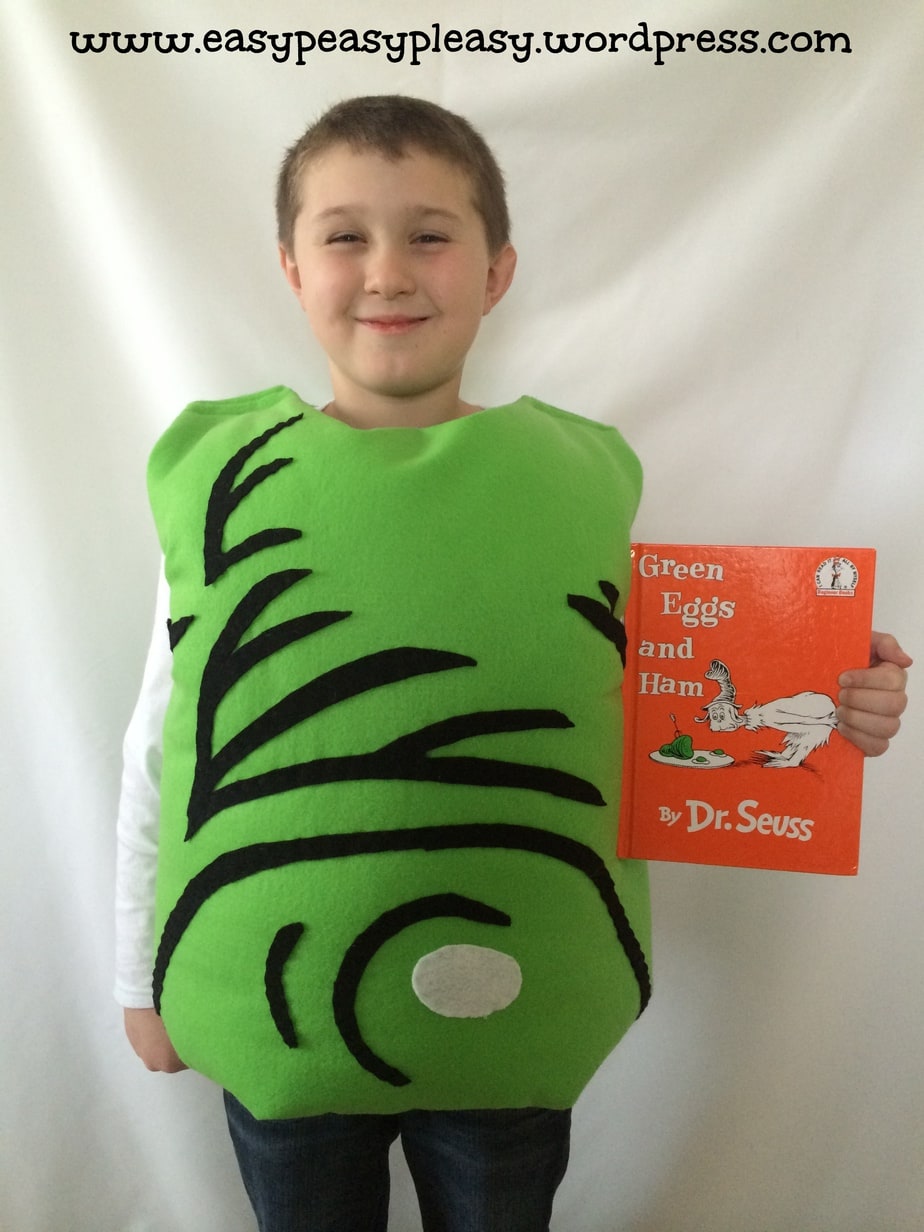
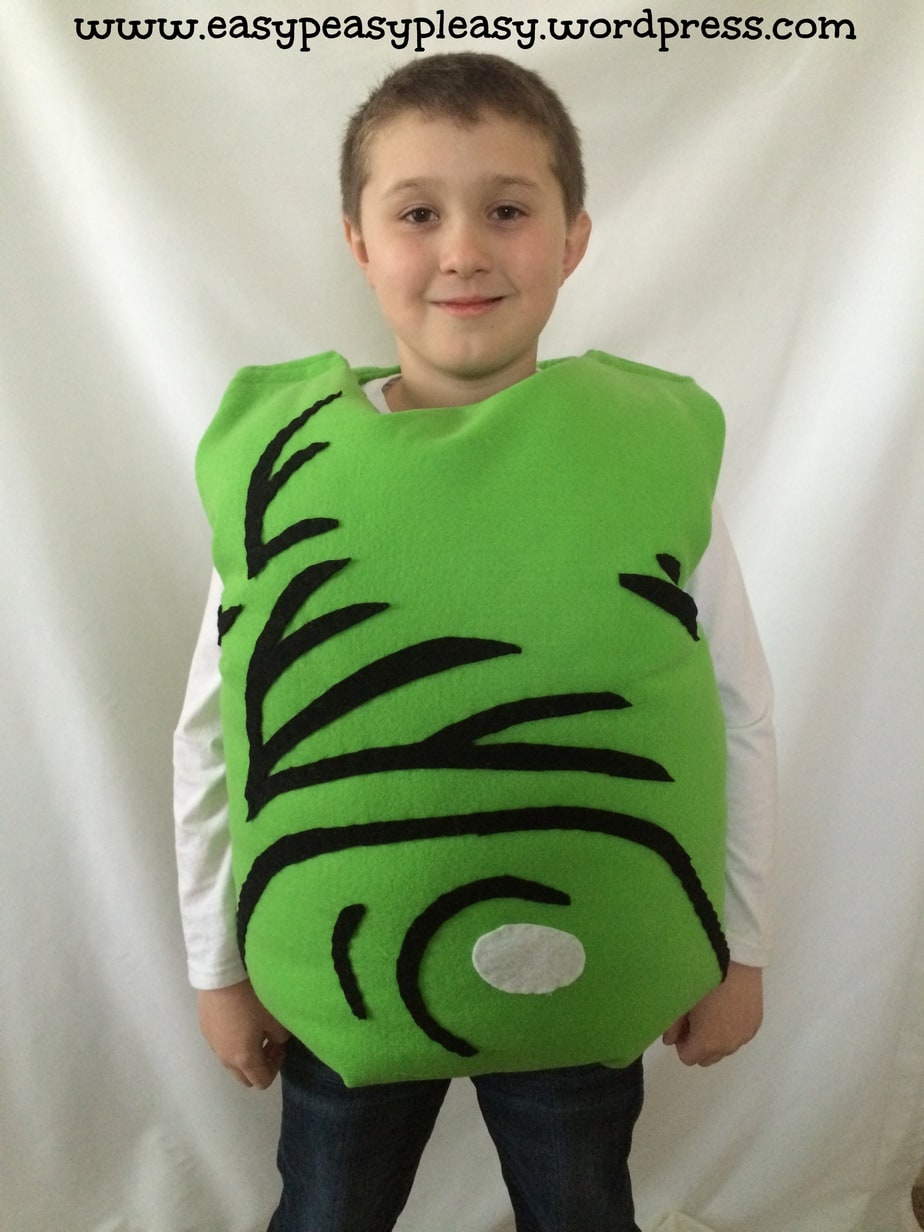
SO…I had this crazy hair brained idea to make Garrett be the actual ham from Green Eggs and Ham. I thought, I already know how to make the eggs and a ham since I made a small version for Garrett’s Sam I Am costume. I might as well give it a go! You can find the full DIY Green Eggs and Ham Costume instructions below.
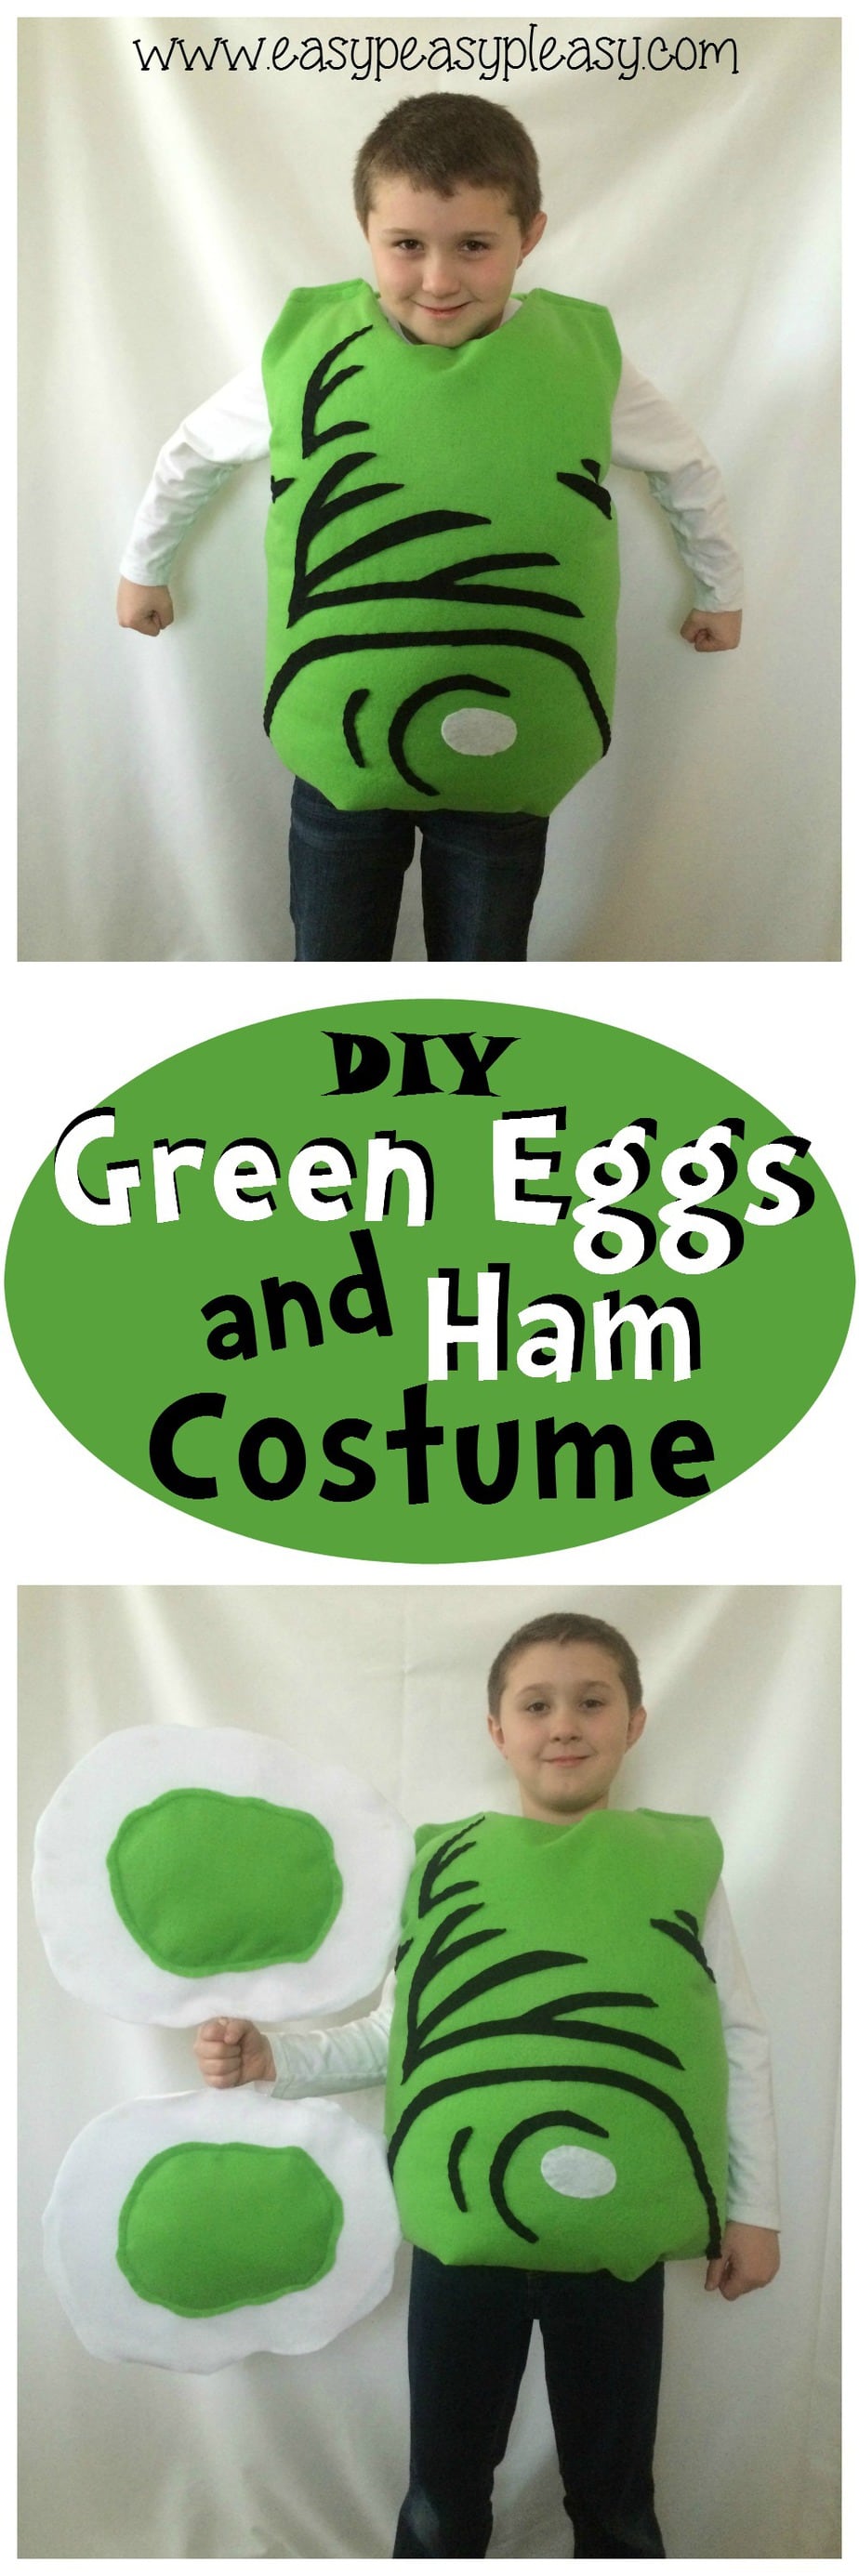
Just a sneak peek of what’s to come!
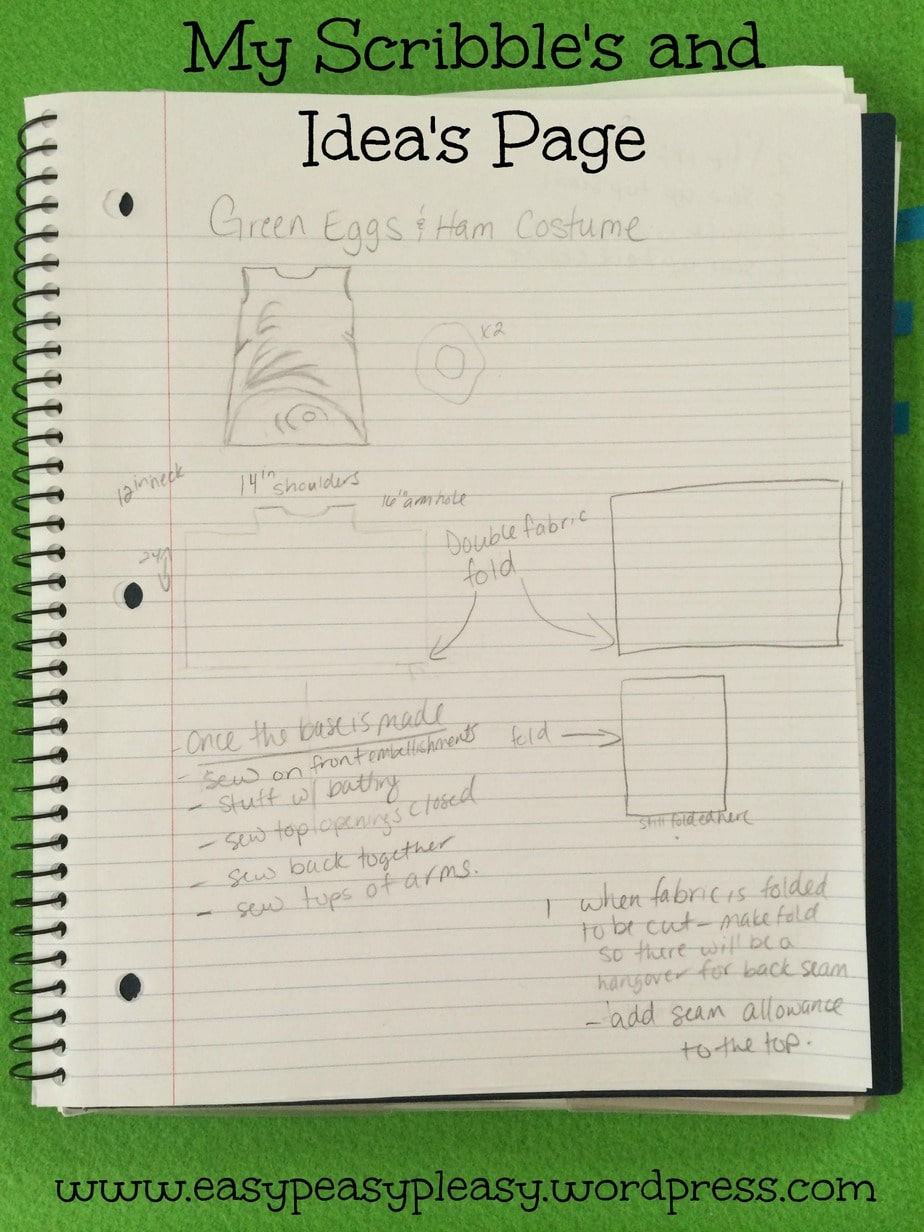
I had to draw out my ideas on my trusty ole notepad first! Here’s a little of my scribble scrabble…
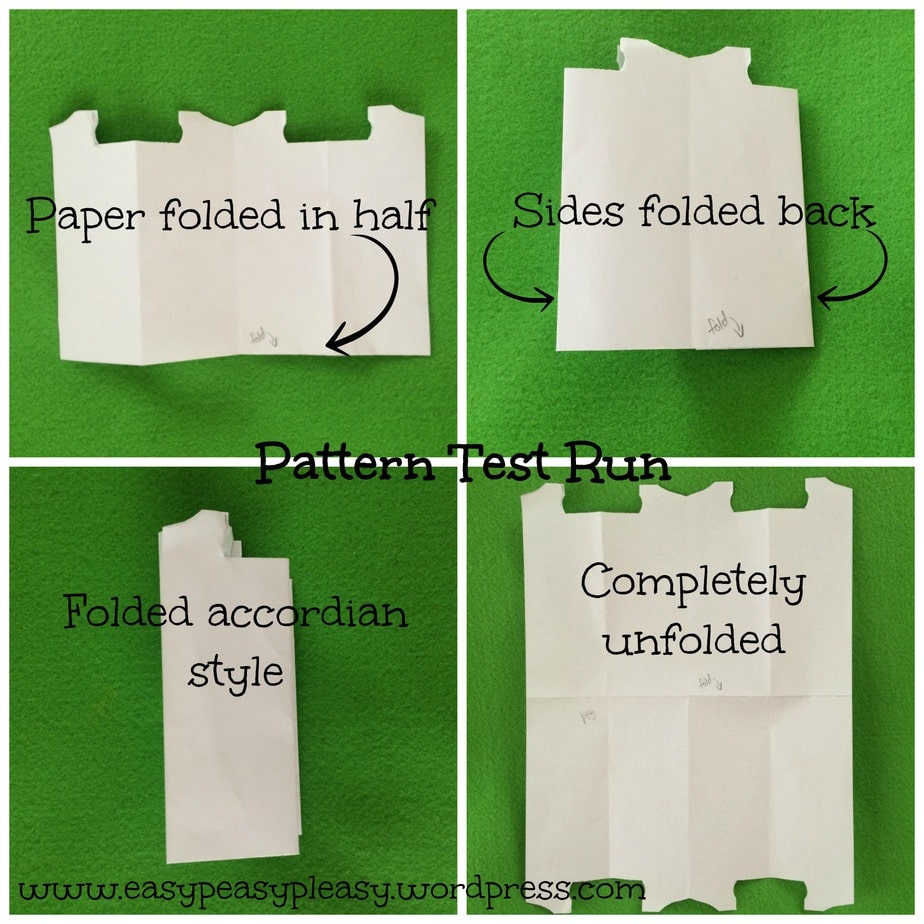
I want to make this costume with the least amount of cutting and the least amount of sewing. So, I took a piece of paper and cut out my idea to make sure it would work.
You could always cut out and sew 2 separate pieces but I wanted less seams.
DIY Green Eggs and Ham Costume
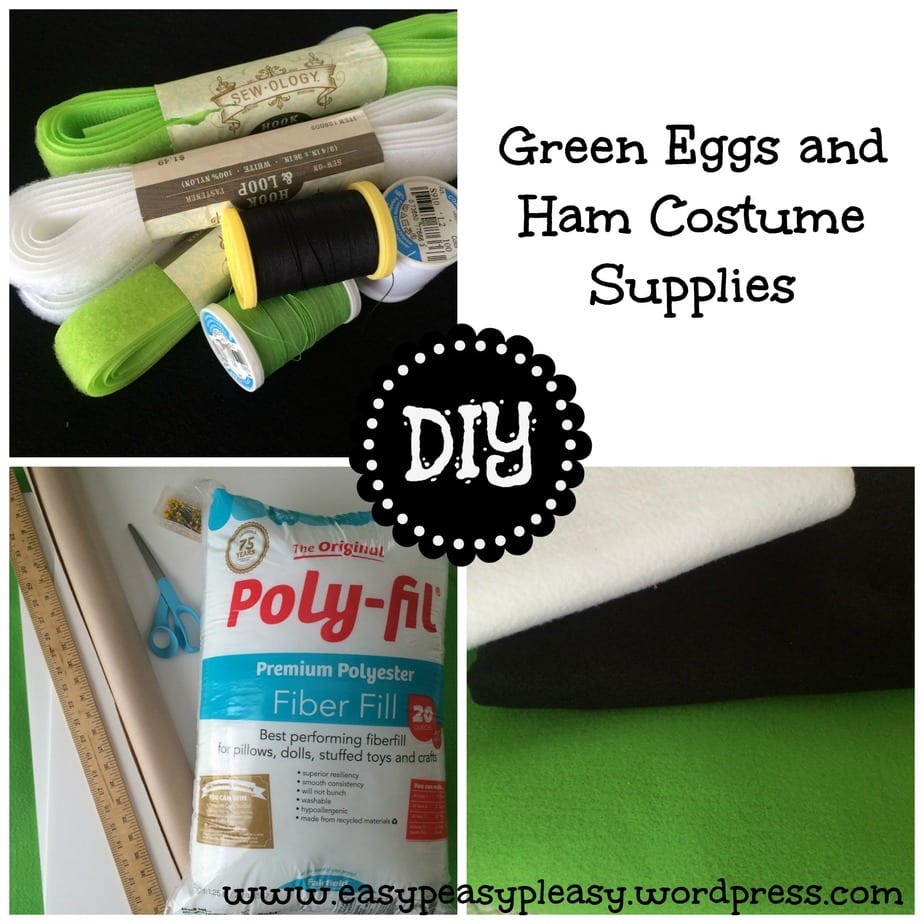
Now for the supplies.
Supplies
- Green, black, and white felt
- Green, black, and white thread
- Velcro
- Poster Board
- Batting
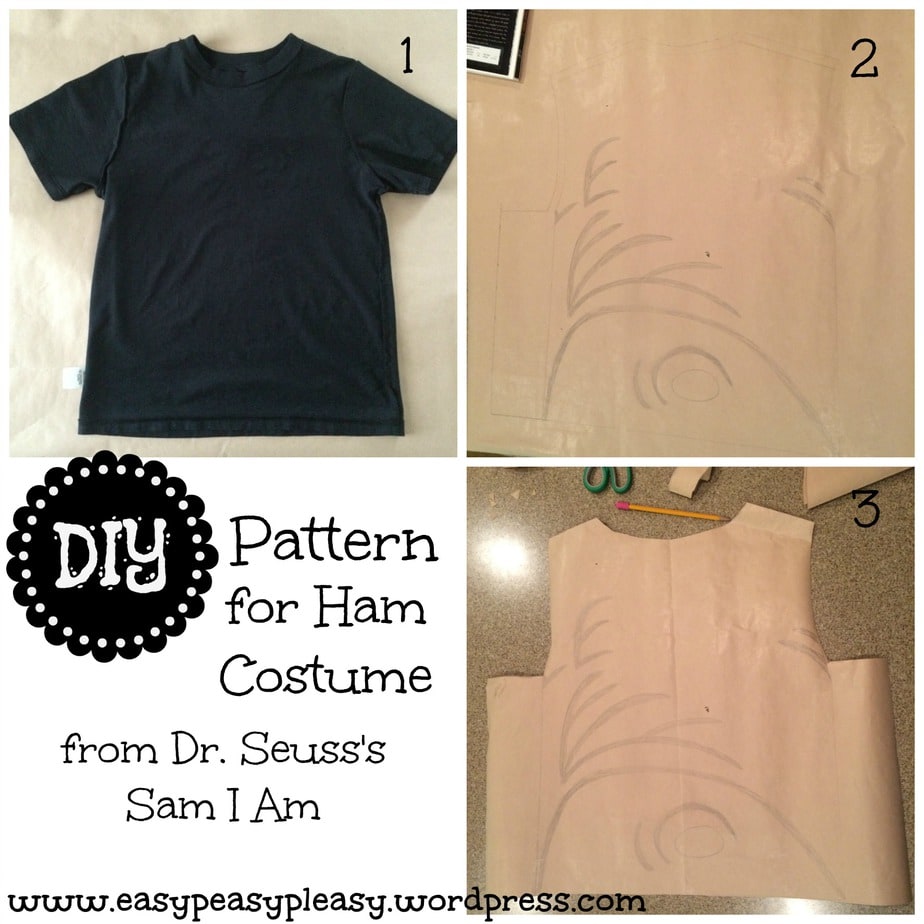
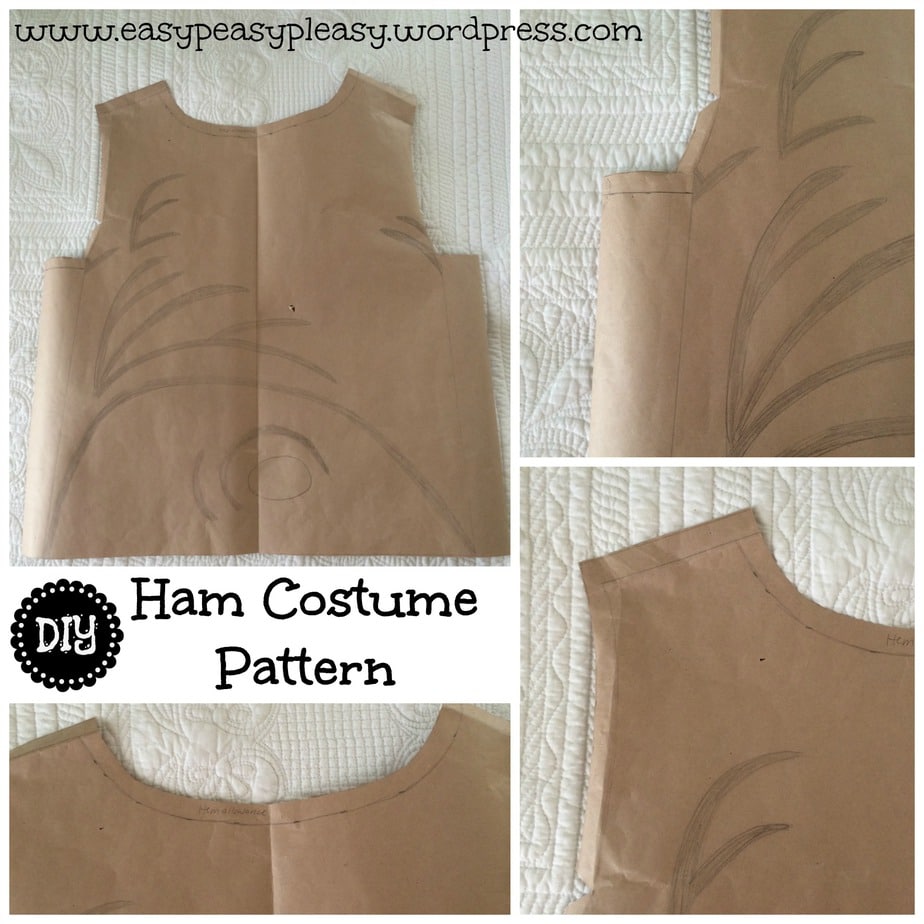
Let’s just say, I wasn’t about to attempt this crazy idea without some sort of pattern! I got out the brown craft paper and went to work.
First, I laid out the brown paper and and grabbed one of Garrett’s over sized t-shirts. I basically just traced around his shirt.Then, with a yard stick, I added a half inch allowance for sewing. Since I knew I would be stuffing the costume with batting, I added some room and a few extra inches on each side to accommodate the extra filling. As you can see in these photos I also drew on the ham design! I’m gonna need that later! I just opened up the Green Eggs and Ham book and copied the ham shading.
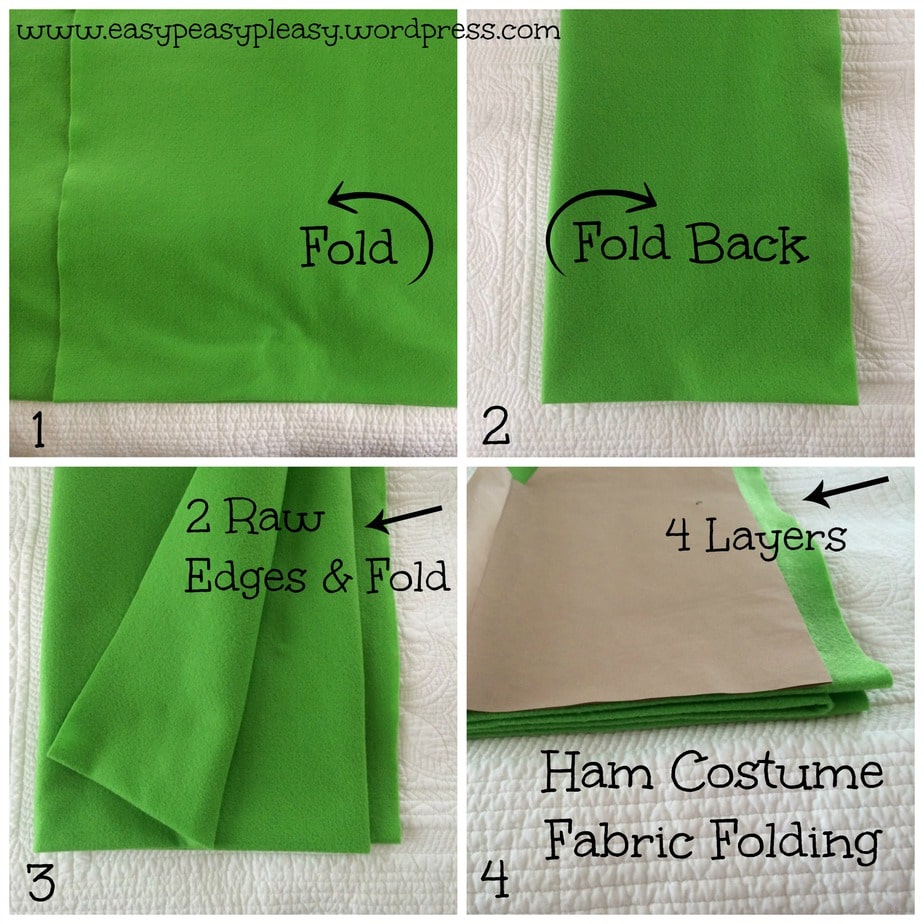
If you are sticking with the less cuts and the less sewing plan you will need to fold your fabric accordion style.
First, fold your fabric in half longways. This will give you the inner and outer piece to the costume. You will need it like this so the costume can be stuffed with batting. Now fold just like I did with the white piece of paper. There will be 4 layers in all. Two raw edges with a fold in between on the right and two folded edges on the left. I left a couple inches of overhang on both raw edges.
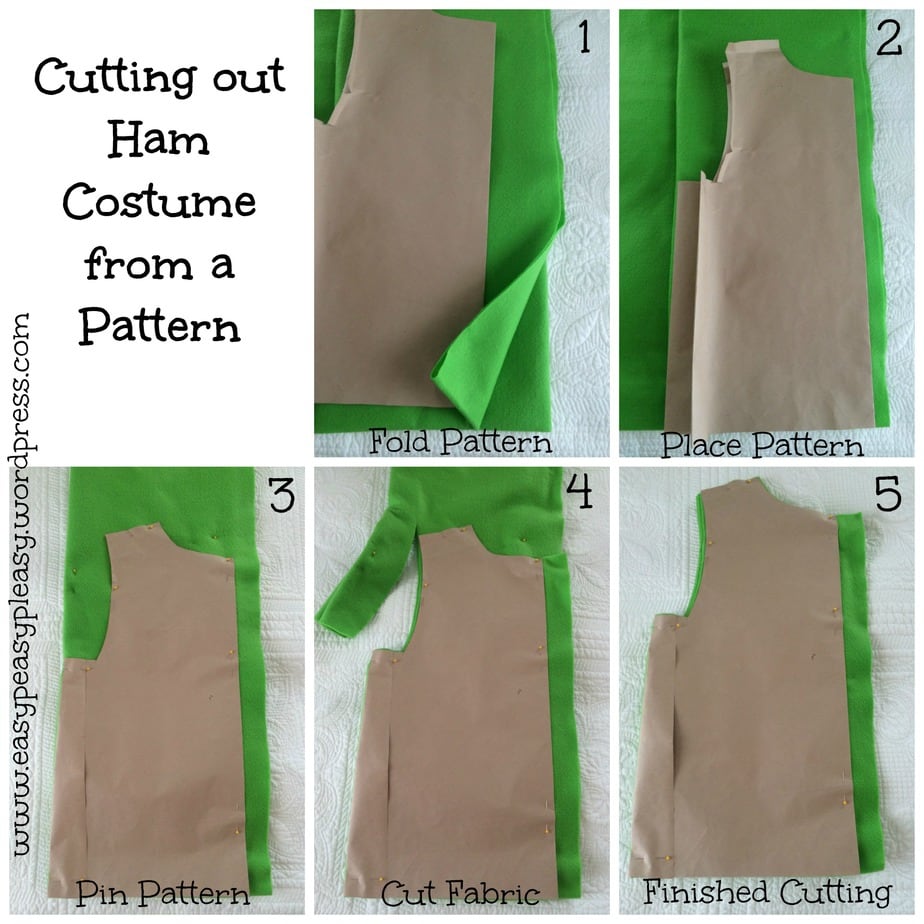
Now onto getting the fabric cut. You’ve got your folded fabric ready so lets take that paper pattern we made and fold it in half. Place the folded pattern paper where the armhole side is lined up perfectly with the left side (two fold side). The neck side will be lined up with the right side (two raw edges with a fold in between). If you notice I have that overhang on the right side. I will use that overhang to attach velcro latter on. Pin your pattern to your fabric. I also pinned my fabric together so it wouldn’t shift during cutting. All that’s left is to cut around the top. See, Easy Peasy!
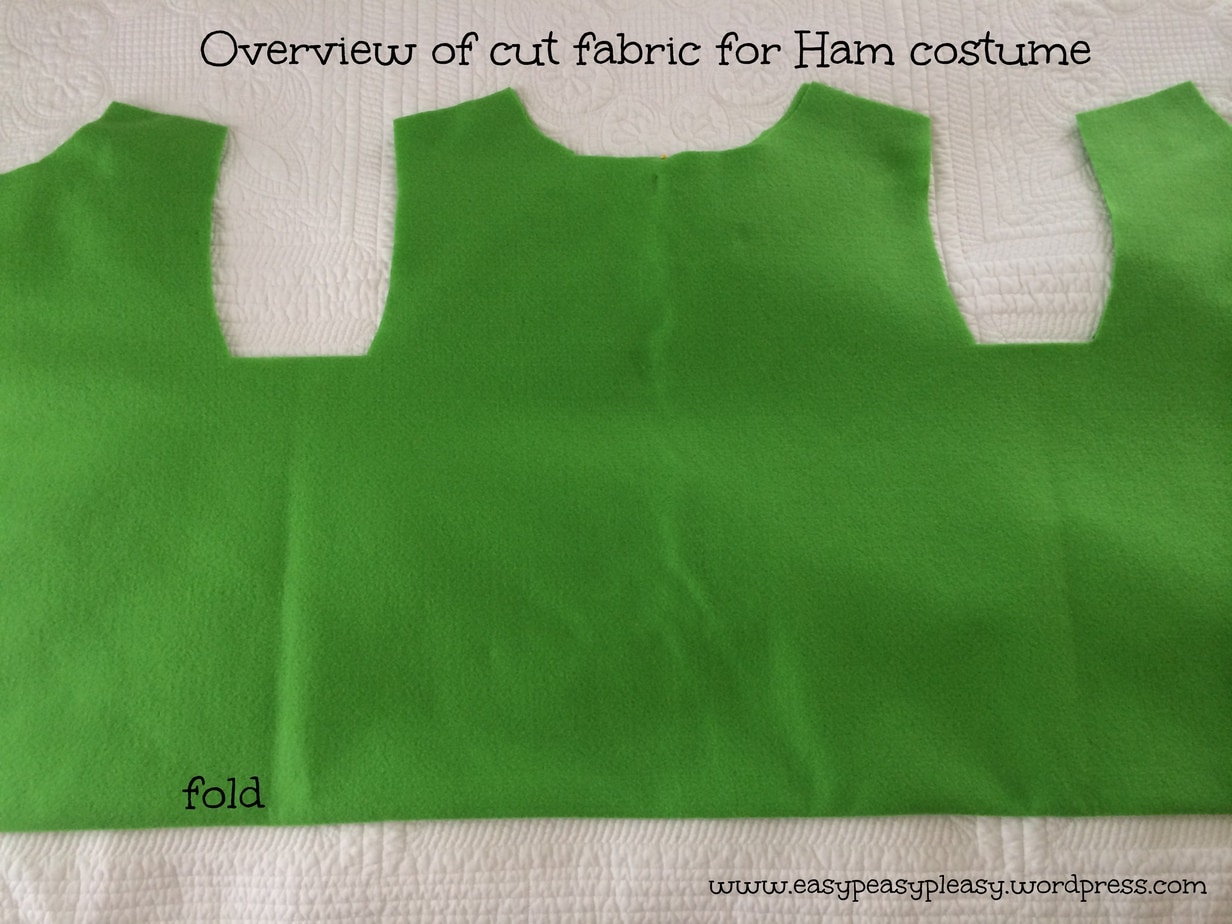
View after the fabric’s been cut and opened up. This is 2 layers. Note the fold.
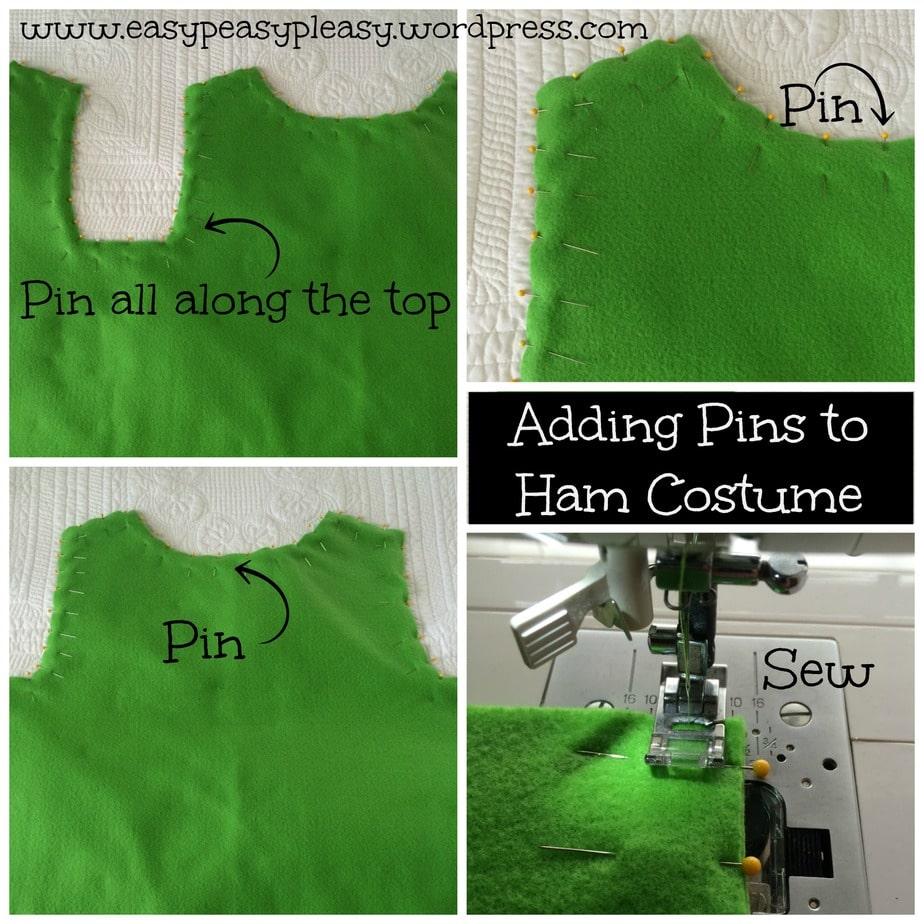
Now you are gonna pin all along the top and sew it up. I used a half inch seam allowance since I added a half inch to my pattern.
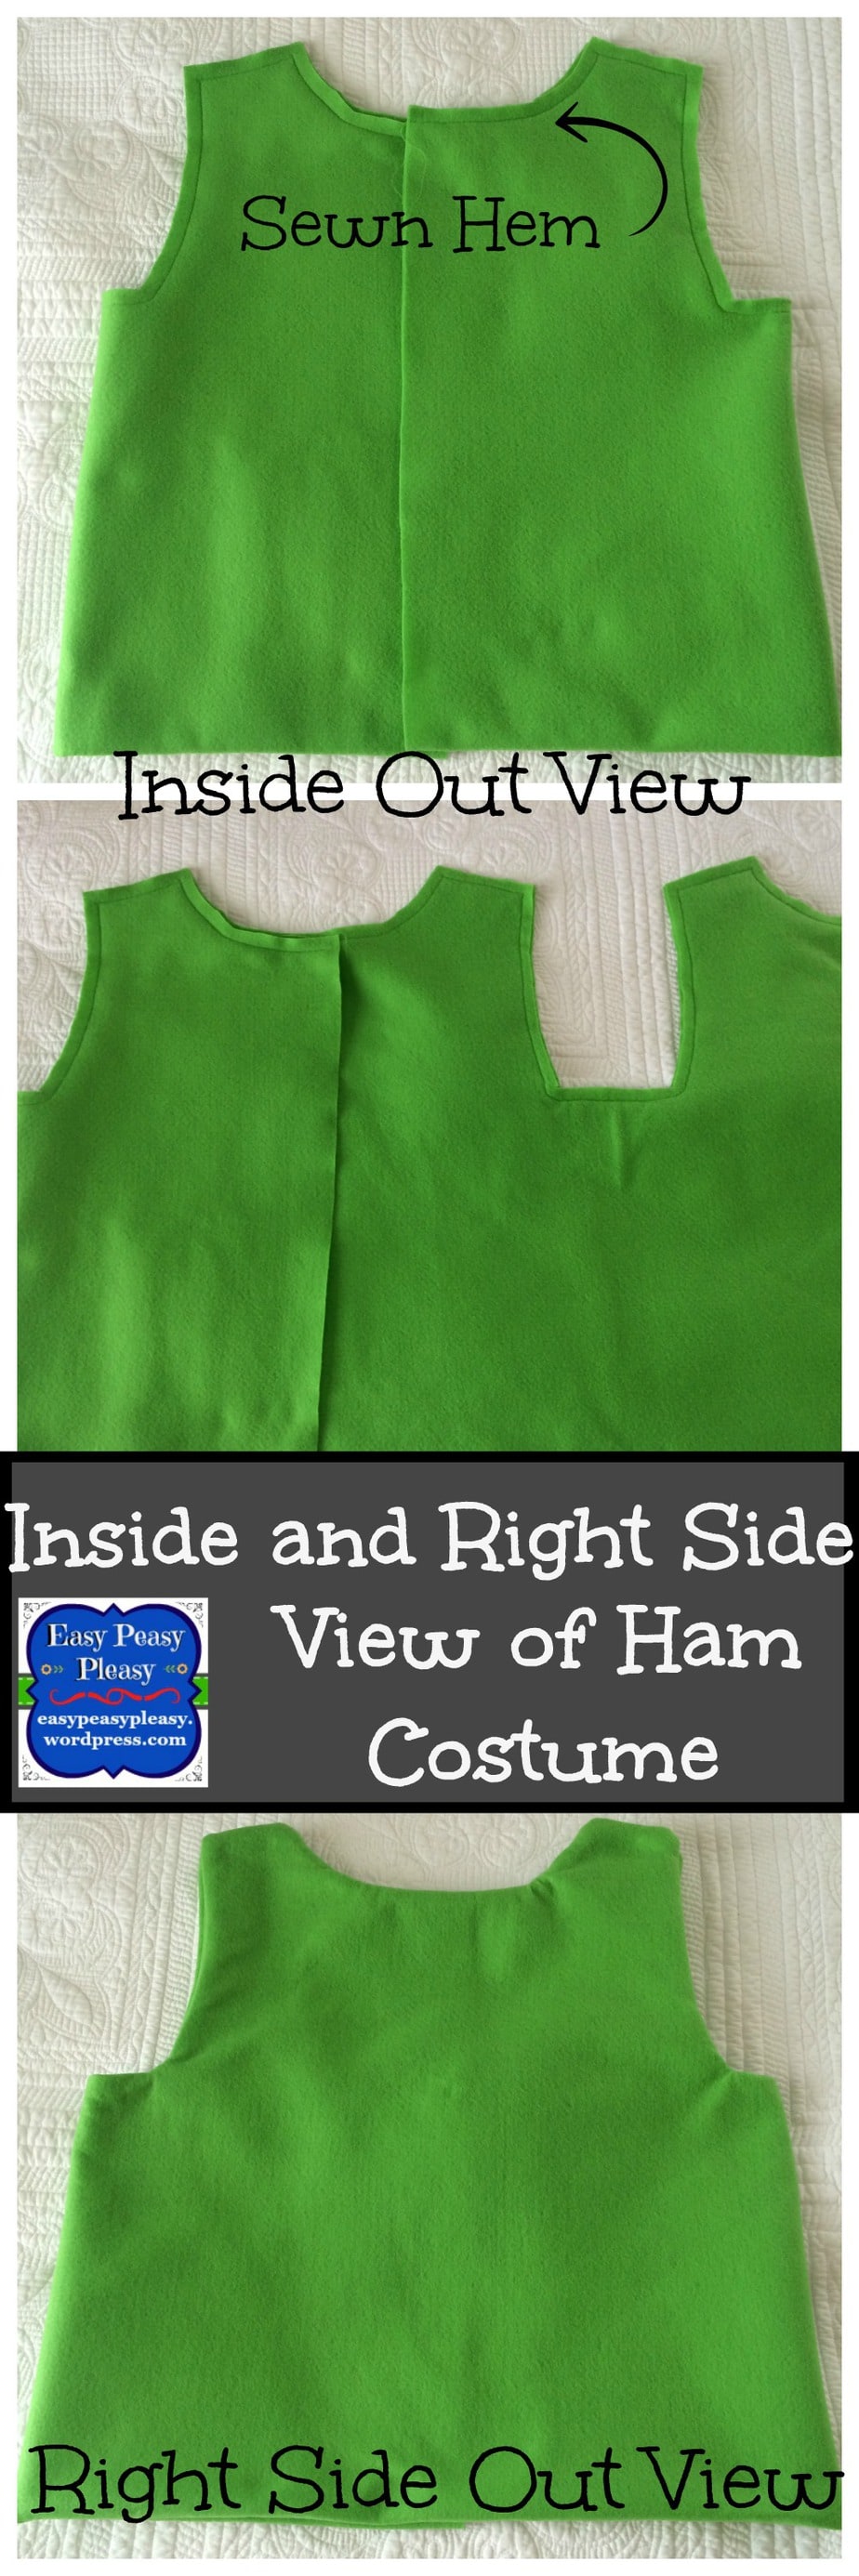
Here are a few pics of how it should look once its all sewn up. Now it’s time to flip it right side out. Great thing about felt, it looks the same on the inside as the outside so we didn’t have to worry about what sides were together before we sewed.
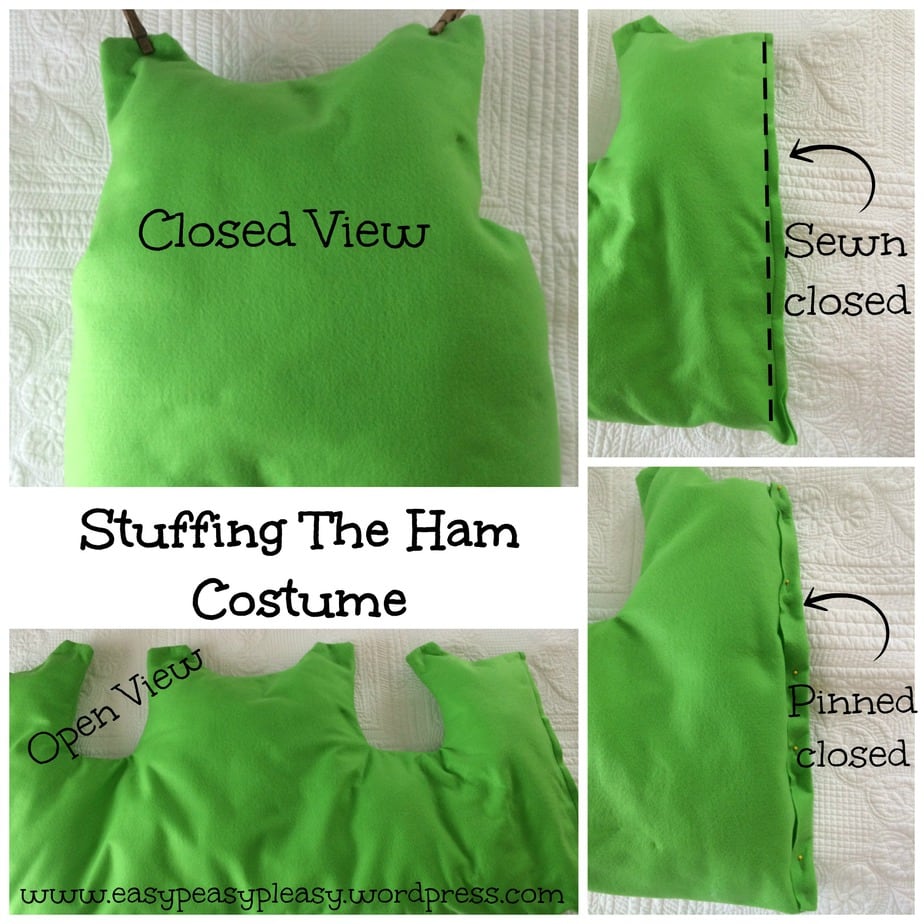
Let’s fill it with batting! Once I flipped it right side out, I closed up one side so I could stuff it with batting. Just stuck a few pins in and ran it through the sewing machine. Now, stuff some batting inside but be careful not to over fill. I tried the costume on Garrett to see if it would still close up behind him and it was way to full. So I pulled out a good bit of batting. Just give it a go on the kiddo to see how much stuffing you need. I used close pins to test it out.
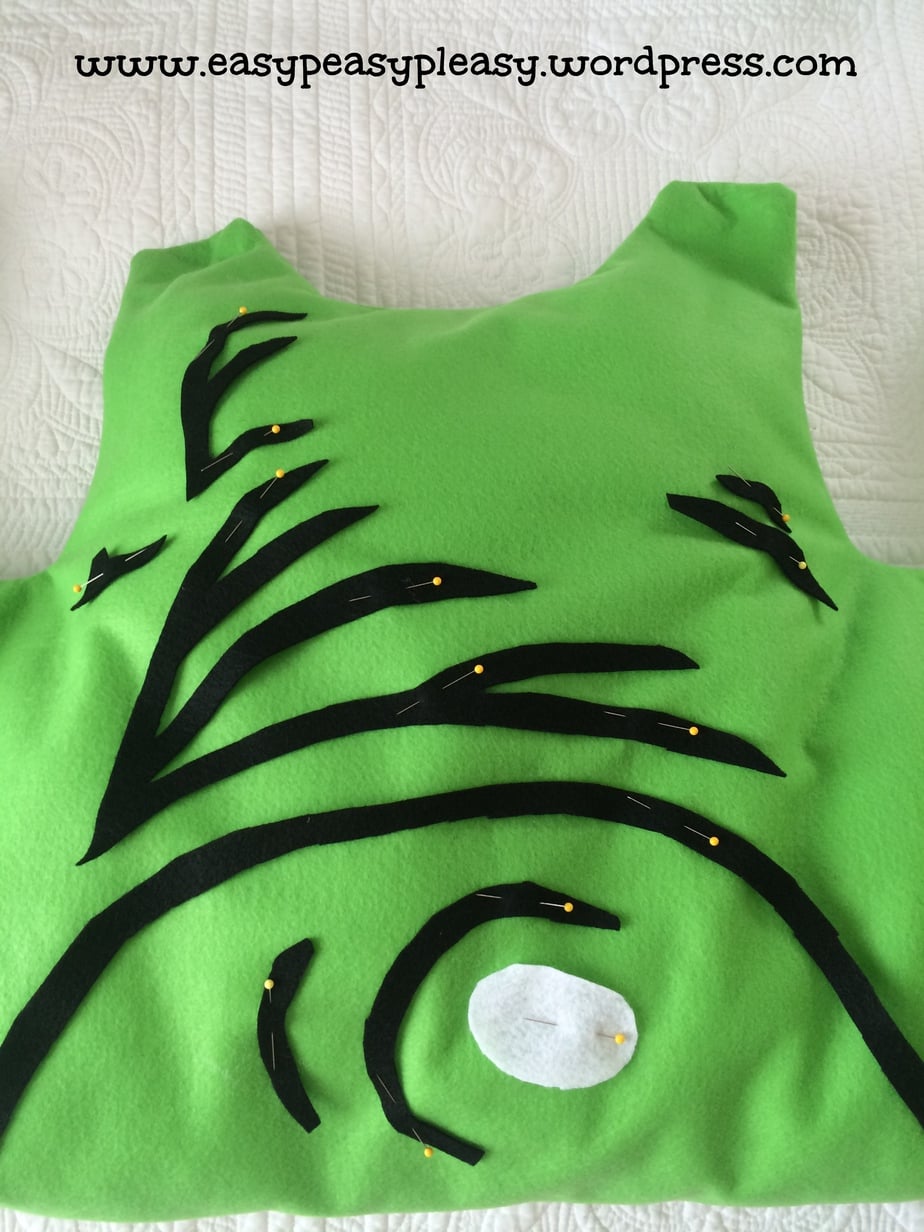
Here’s where drawing my ham shading came in handy! I just cut those drawings out, pinned it to black felt and cut out my shadings. If I would have been thinking…I would have just laid my whole pattern over the black felt, pinned it down, and cut the shading out once. There’s a time saver for you! I think I was trying to get as many pictures as I could so I wouldn’t forget to share a step and actually added an extra step for myself! What are you gonna do! LOL!
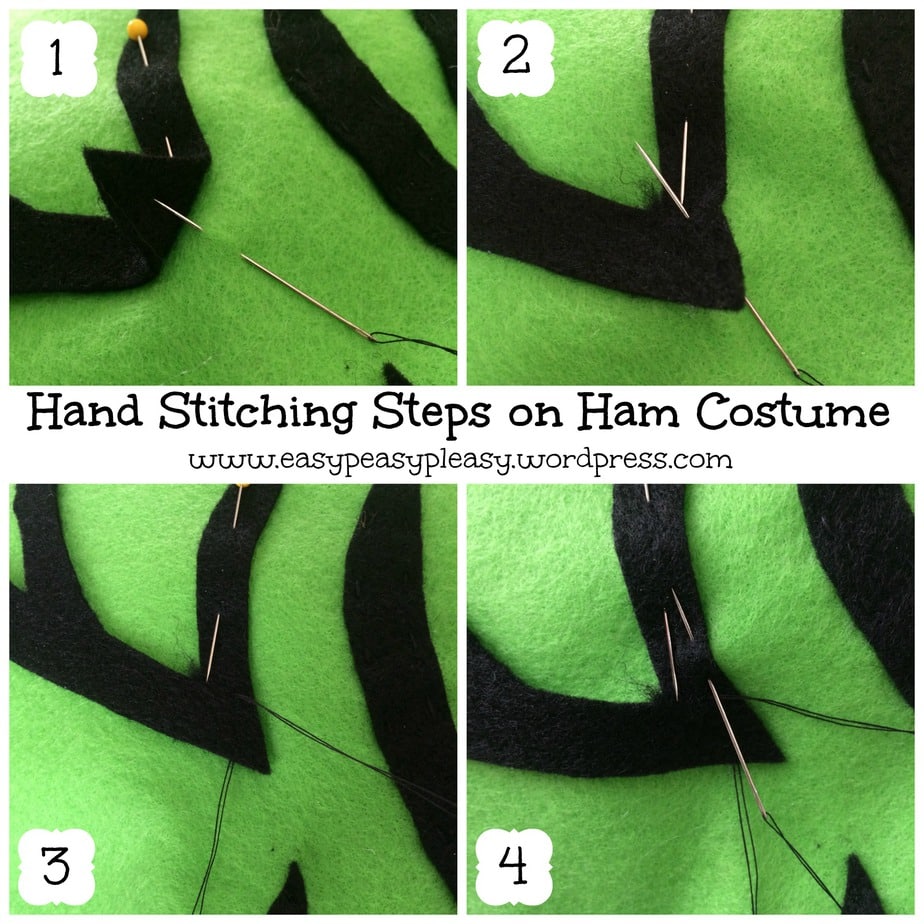
I’ve got everything cut out and pinned into place. Now to sew it all on. You could have sewn the shading on before you sewed up the top hem but I am a very particular person and wanted to make sure everything landed just right. I couldn’t have the shading off center or womper jawed. So I went the harder route…HAND SEWING…BOMP BOMP BOMP! If you are like me then these next steps will be useful!
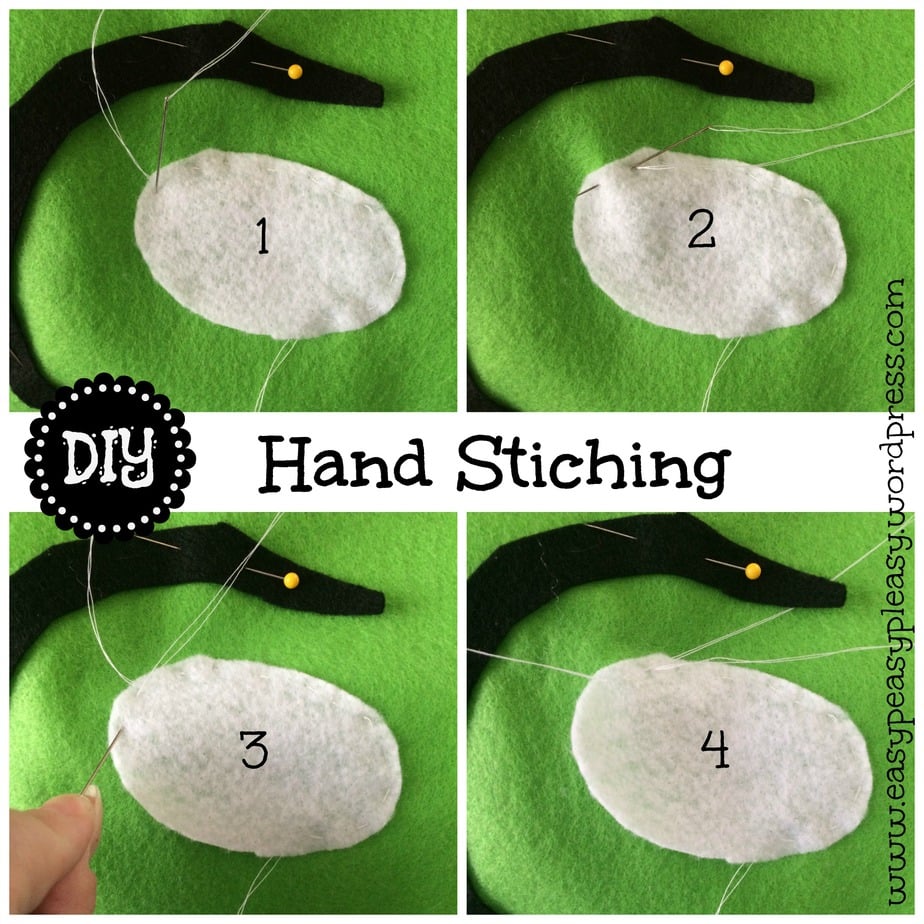
I lifted up the piece I was about to sew and put the needle through the green felt. Mind you, the needle has been threaded and knotted already. I pulled it through making sure the knot would be hidden under the shading. I inserted the needle through the black felt and pulled through. I then put the needle back down through the black felt and green felt and back up.
Picking up where we left off (I just happened to have taken more pictures of stitching the bone), keep inserting your needle through the top fabric and green fabric and pushing the needle back up through the green fabric and top fabric. Continue this all the way around.
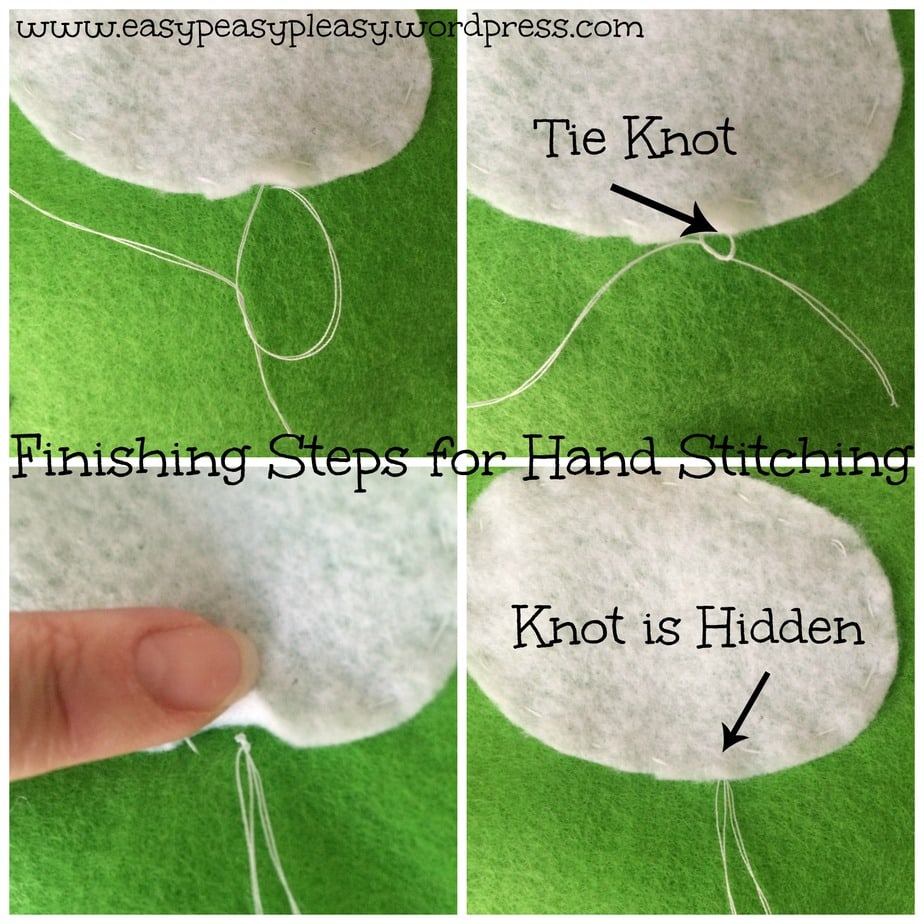
Here’s how I finished it off. Once I got to the end, I left enough space to tie off a knot. I inserted the needle into the white and green felt. I came back up through the green felt but not the white felt. I tied the beginning knot to the ending thread multiple times. As you can see the knot is now hidden. Just cut off your excess thread and you are done!
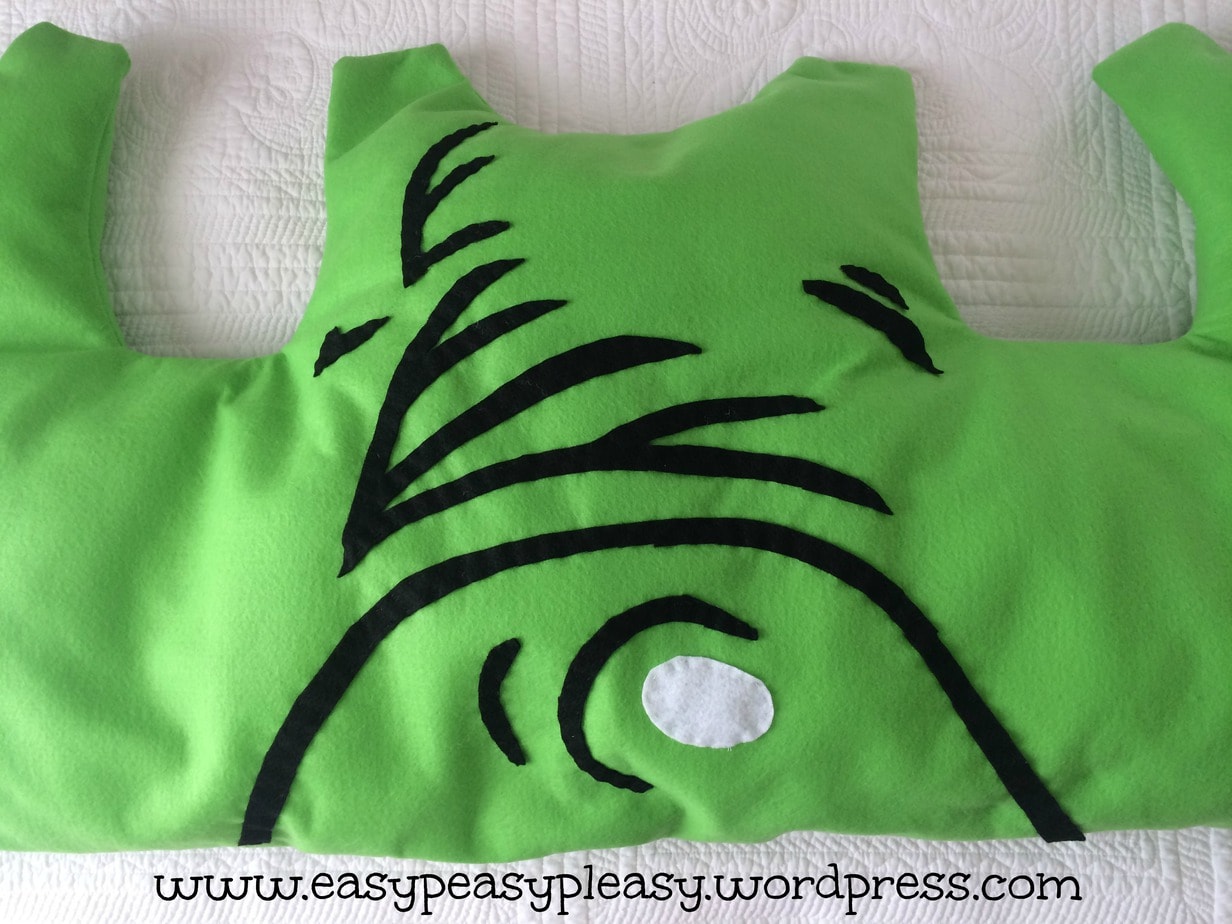
Here is an overview picture of how the costume is looking so far.
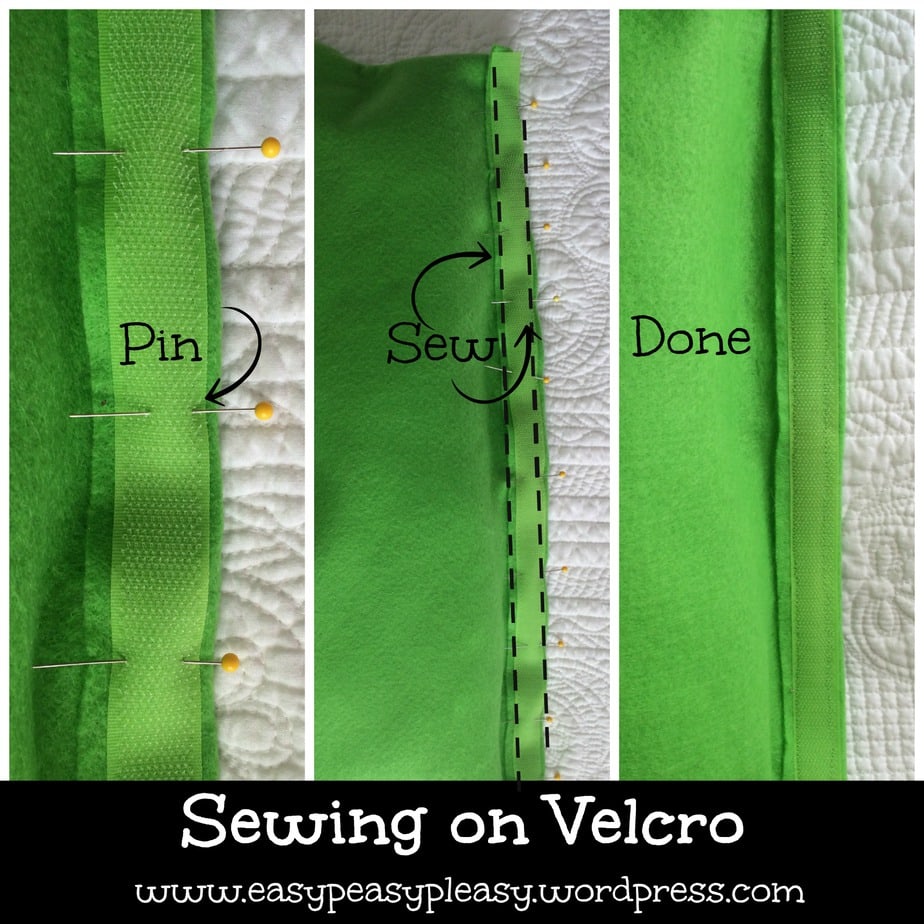
Getting down to the last steps! Just gotta sew on that velcro. I sewed velcro on to each end so the back would close up and stay fastened. All you do is lay your velcro down where it lines up with the side edges, pin in place, and sew. Make sure you put hook on the outside of one side and loop on the inside of the other side.
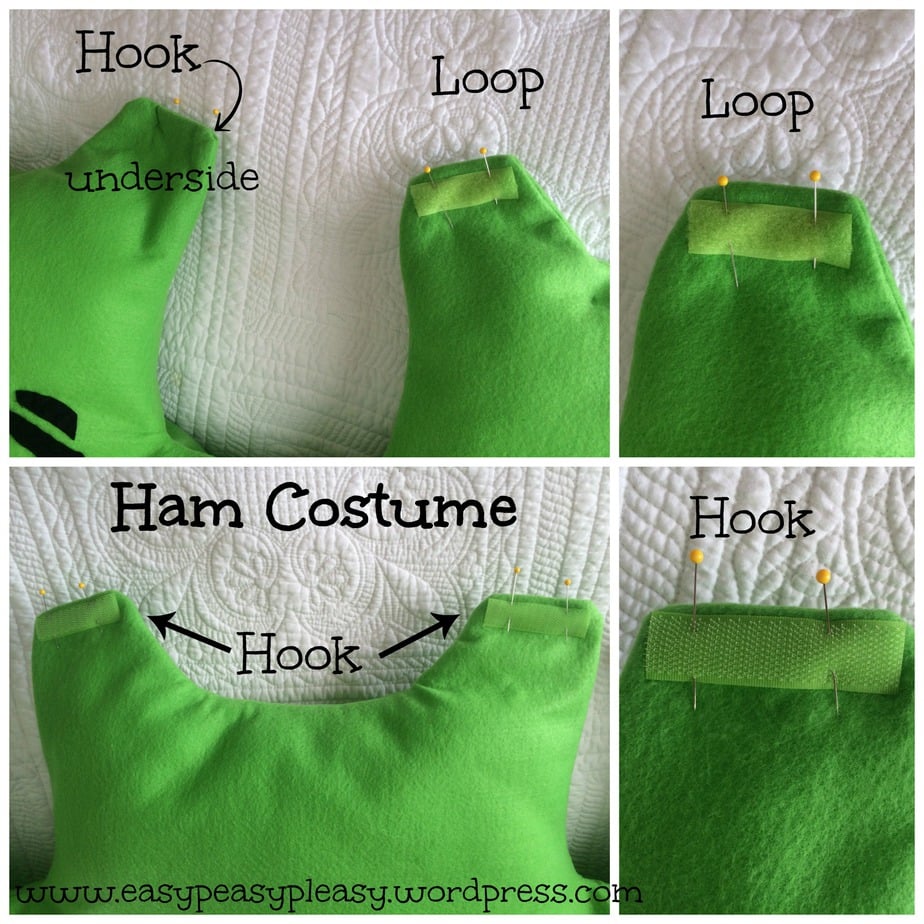
I sewed velcro on the top tabs as well. This is the part that goes over the shoulders. I wanted easy on and off. On the front of the costume I put the hook side of the velcro on the underside of the shoulder tab. On the back of the costume I put the loop side of velcro on the top of the shoulder tab.
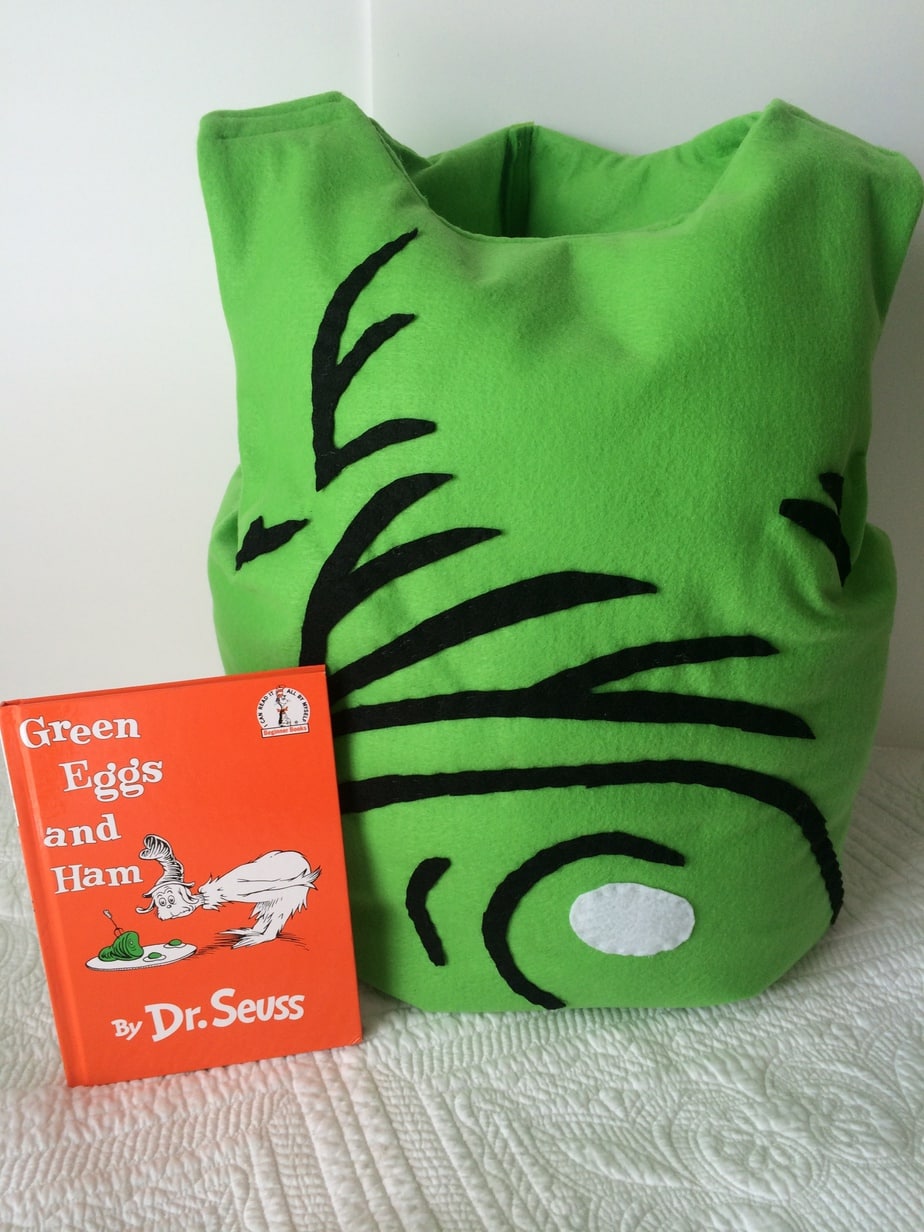
It’s all ready to go! It can stand up by it’s self! It’s the amazing, wonderful Green Ham! Ok, maybe I took it just a little to far…don’t tell anyone!
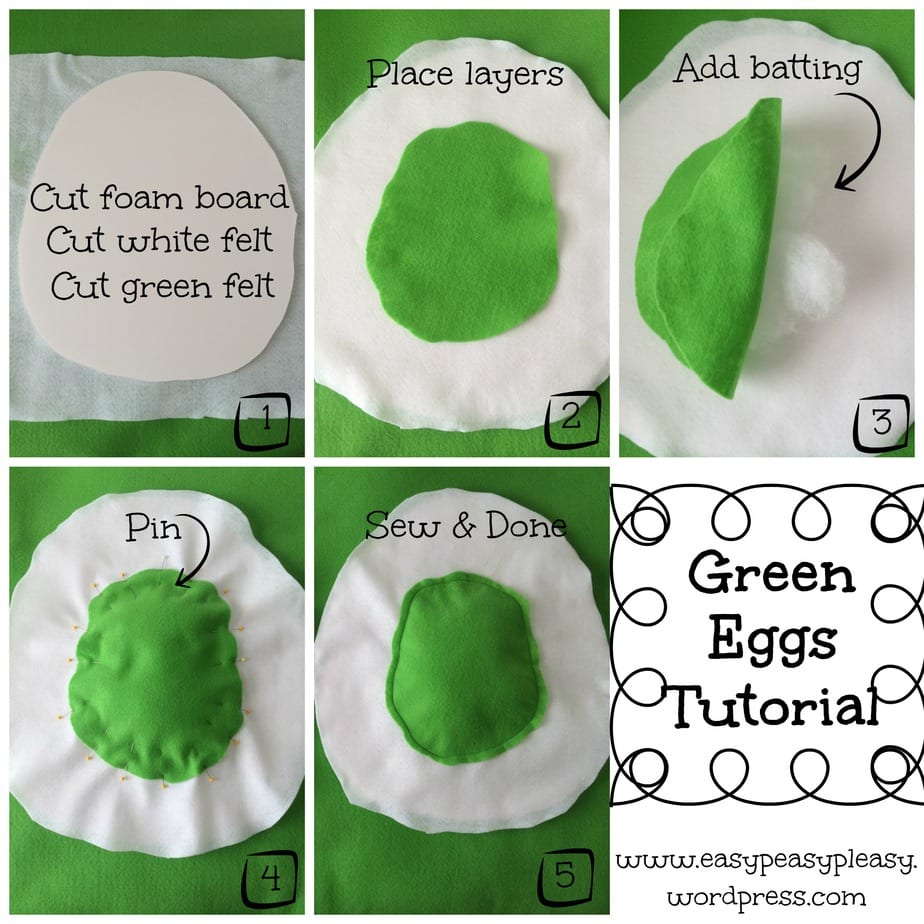
The eggs are super easy. I just drew out the egg shape I wanted on foam board and cut the board with a box cutter. I then traced that shape on white felt and cut it out. I free handed a yolk on green felt and cut it out. I placed the white and green felt layers together and added a little batting. Then, I stuck some pins in to hold it all in place and sewed it up on the sewing machine. Finally, I hot glued the green eggs to the foam board and taped a wooden dowel to the back as a way for Garrett to carry them. After all, he is Green Eggs and Ham! I think it would be fun to make a couple of Egg costumes for your friends and make it a 3 person costume! I wish I would have thought of that earlier!!!! There’s always next year! What are your kiddos dressing up as for Dr. Seuss’s Birthday?
Are you looking for more costume ideas?
Looking for an even easier idea? You can always order a costume!
{*This post contains affiliate links which means that if you click on one of the product links and make a purchase, I’ll receive a small kickback for referring you. It does not change the prices at all for you. All opinions expressed are solely my own.}

Thanks for visiting my blog! Please share your Dr. Seuss ideas with me and feel free to ask questions! If you like what you see, make sure and put your email in so you can get all the latest post from https://easypeasypleasy.com!

